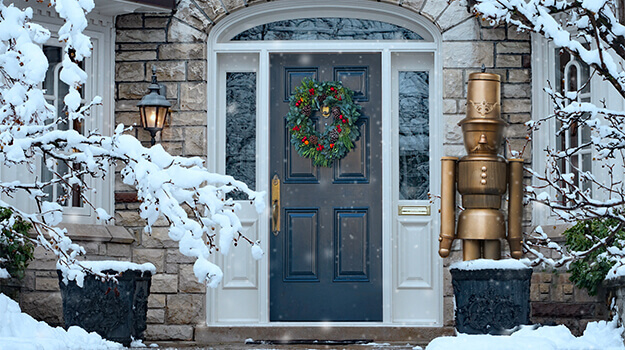
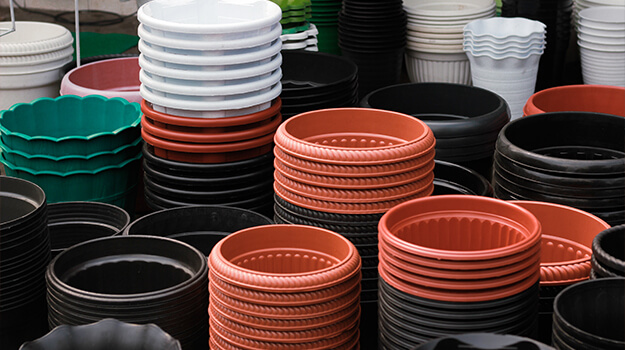
Our nutcracker is almost entirely made from plastic pots. Since there is a wide variety of pots and planters, you just have to vary the shapes and sizes to get a result similar to the soldiers offered in stores.
You can make it in different sizes. It is easy to move, inexpensive and relatively quick to make.
The most talented will be able to draw a face on it, but otherwise, once uniformly covered with spray paint, the result is very professional. As a bonus, it withstands the cold and bad weather, so it can be used outdoors!
What you need to make this Christmas decoration
For the hat
- One or two cylindrical pots stacked on top of each other (enough to give it height)
- A round saucer for a large pot (to create the visor)
- Ornaments of your choice: cord, buttons, etc. (optional)
For the head
- A bowl-shaped, ball-shaped or cylindrical pot
- A bell, a piece of wood cut into a quarter-round or another accessory for the nose (optional)
- Wooden arabesque for the moustache (optional)
For the torso
- A cylindrical or oblong pot, or a pot that’s tapered at the bottom (to simulate a fitted coat)
- A round saucer for a large pot (to close the opening of the pot that will serve as the torso)
- Ornaments of your choice (optional)
For the hips
- A cylindrical or bowl-shaped pot, almost as tall as it is wide
For the legs and arms
- Plastic cylinders (we used leftover ABS pipes – one 4-inch and one 2-inch)
Note: You have more options for the legs and arms if you plan to keep your nutcracker indoors. For example, you can use cardboard tubes that you can find at the hardware store.
For the hands
- 2 Christmas ornaments
For the shoulders
- We used PVC fence post covers, but you could also use small saucers for pots or other Christmas ornaments
For the feet and the base
- Treated patio lumber scraps
Note: You can use a variety of objects for the feet or the base. The challenge is to make sure your nutcracker is well balanced and well anchored so it can stand!
For assembly and painting
- Heavy-duty construction adhesive for indoor and outdoor use that can bond a variety of materials, including plastic
- Caulk that adheres to plastic and can be painted (optional)
- Spray paint for indoor and outdoor use
Note: We used a metallic colour here, but the result is beautiful in white or black, lacquered or matte, or in any colour you like, whether it’s simple and classic or cheerful and playful. Remember to harmonize the colour of your nutcracker with its future environment!
Making a giant nutcracker, step by step
- Start by gluing the saucer (upside down) on top of the pot that forms the torso.
- Glue the pot that serves as the head on the saucer. The more balanced your nutcracker is, the easier it will be to make it stand on its base.
- Place the pot that forms the hips upside down and glue the torso on its base (these pots will be glued base to base).
- Use the adhesive to glue the other saucer in the opening of the pot serving as the hat. Shift it slightly forward to form the visor of the hat.
- To create the legs, glue the two largest cylinders inside the pot serving as the hips (on the sides, neither too far forward nor too far back). You can reinforce the legs by gluing a piece of wood or Styrofoam between them, high enough so that it is hidden in the pot.
- Glue the two cylinders serving as arms on each side of the torso.
- Glue the shoulders and hands.
- Place your nutcracker on its feet. Make sure it is well balanced before gluing.
- Place the nutcracker on its base. Again, make sure it is well balanced before gluing. Choosing a wide and fairly thin square base will allow you to place decorative objects on it, such as a pot filled with fir branches. This will also help your nutcracker remain standing in case of high winds or when the children are overflowing with energy.
- Add the chosen appliqués (nose, buttons, textures, cord, moustache, belt, etc.). Note that all of these elements are optional. The current trend is for very refined nutcrackers.
- Once the glue is completely dry, you can use a caulking product to seal the gaps between the different components, or to make a perfect joint between the appliqués and the pots.
- Use spray paint to apply a uniform colour. Do this outside, on a windless day, taking care to protect your eyes, hands and clothes. Let dry thoroughly.
Note: Spray paint does not create any demarcations, so you can superimpose the layers without any problem. One layer will most likely be enough. And to renew the magic Christmas after Christmas, apply a different colour to your nutcracker every year!


